January 23, 2014

Romantic Rosey Journal Cover

Roses are always so romantic,
and when I spied the new Rosey fabrics
by Tanya Whelan, for Free Spirit,
I fell in love with them!

I ordered mine from Quilt Home
where there is always free US shipping with a $50 minimum order.

{There may have been some stowaways in the box, from other Tanya Whelan lines!}


Then my friend asked me to make a cover
for this notebook,
featuring a botanical print of a rose.

{It's just too pretty to cover up that cover with a cover, right?}


That's when I realized that I could use my own
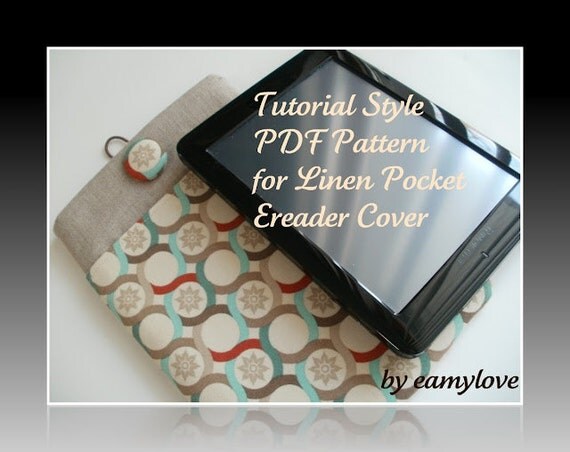
PDF pattern for the
to fashion a place to store the beautiful journal.

{It was so simple to make...I finished it in about an hour and a half!}


Instead of linen, I just used a coordinating print...
which had somehow jumped into the shopping cart...
from Sunshine Roses, also by Tanya Whelan.

{How did that get in my stash?  See above...}


For the interior, I selected another Sunshine Roses
fabric, a pale green damask.

{See my eamylove label?  There will soon be a post about those!}


This notebook has a very large spiral,
so it was good to know that my pattern would work
to cover a thicker notebook like this one,
as well as a slim tablet.
I just followed the instructions on my pattern,
and actually allowed an extra 1/2" for the thick spiral.

{It was plenty big in the end!}


The only other modification I made
to the original pattern was to add
a dividing stitch for the front pocket,
for keeping a pretty pen.


The Rosey fabric
was just perfect for a lovely covered button detail.


I'm so pleased with the outcome...
a stylish and sweet cover
for a very pretty journal.
It just invites you to sit down
and record some happy memories.

{There's something very Cath Kidston about that Rosey print. Must be why I love it!}


If you would like to order a pattern
for the Linen Pocket Ereader Cover,
it's available on Craftsy

Come back soon for more romantic rosey projects!

Pin It
January 20, 2014

My Very Cherry Kitchen

Welcome to my kitchen!
Let's take some time to enjoy some tea,
and I'll show you something new I've made!


One way to beat the winter blues
is to stitch up something new for the kitchen table.


I've got a little kitchen that may be
undergoing a few changes in 2014,
according to my husband.
It's got lots of oak cabinetry,
and the walls are painted a shade of aqua-green
that I just adore.

{My favorite thing is this Hoosier cabinet...
a family heirloom that deserves its own post someday.}


Every chance I get,
I like to add a little pop of cherry RED in the kitchen.
That's why I chose these two awesome prints
to make my new table topper.

The gingham check satisfies my "thing" for gingham
and lends a picnic feeling to the kitchen every day.
It's an excellent quality, woven gingham,
and the shade of red is just what I was looking for.
The fabric weight is a wee bit lighter than home dec,
so it blends perfectly with either quilting cottons or home dec prints.


The cherry print reflects my favorite vintage kitchen theme,
and it even has a tiny aqua polka dot 
throughout the background...
a perfect match for my kitchen walls!
The cherry motifs are about 2 - 3" across,
so they show up beautifully.


I took a cue from the Christmas tree skirt I'd made,
and I fashioned a hexagonal table topper,
using the two prints in alternating strips.


I just stitched up the triangles to form
a giant hexagon.
Because the fabrics are home dec weight,
I left the topper unlined,
and just finished it off with a hem.


The table topper is such a sweet way 
to brighten my kitchen table.
I'll leave it on the table for tea,
but when it's dinnertime,
it's easily whisked away for storage.


Stop by my blog again soon,
and I'll make something else for my
Very Cherry Kitchen!

Pin It

January 18, 2014

Trees and Quarter Squares for Quilty Fun

Time for a Quilty Fun Sew Along update...

I had sew much fun making the lollipop trees last week!
Choosing fabrics was easy this time.
I only needed 3 main prints for trees.

{Since I live in Pennsylvania, I decided to make my trees 
in green, red, and yellow fabrics.}


I've been using a bit of black here and there,
to tie in all of the blocks,
and in this block, it made sweet tree trunks.

{The black gingham print is from Sweetwater's Mama Said Sew! line.}


This week's Quilty Fun Sew Along block
was Quarter Squares,
made oh-so-scrappy with 20 different fabrics!


When I was finished stitching the little squares,
I just had to put them into my dishes,
to show you how yummy they were!


Even though I used my 50 wt Aurafil thread
for piecing these little cuties,
my blocks came out a bit smaller than expected.
Thankfully, though, they were still oversized
enough to allow for trimming to the final 2 1/2" size.


I put them together as randomly as possible...


I really like making lots of blocks,
assembly-line fashion.
It takes almost no time!


They play together so nicely, don't they?


and now they are waiting patiently
for the rest of the Quilty Fun blocks to be sewn.


This sew along is making me happy in 2014!

Don't forget...
we're taking signups for the Skinny Pinny Pincushion Swap
through the end of January.
Details here...just email me to register!
Pin It
January 16, 2014

Getting Skinny for 2014

I'm not really a fan of New Year's resolutions.
This year, though,
I've decided to GET SKINNY,
and I'm inviting all of my quilty friends
to join me!

{Come on...it's going to be FUN!}

We're getting skinny by having...


No matter what your dress size,
and even if you don't think of yourself as a skinny girl,
you can do this!
It's so easy!!!

to create a one-of-a-kind,
made-by-you, made-for-your-swap-partner


Maybe you remember the month
the Across The Pond Sew Along.

{Susie is super skinny - she made two of them! So inspiring!}

Susie's pair of Skinny Pincushions
My sweet bloggy friend Nesta,
somehow came up with the idea to have a
Skinny Pincushion swap.
It's going to be just the cure for the winter blahs!

Nesta's skinny and sweet pincushion
A Skinny Pincushion is easy to make.
You can add some assorted goodies just for fun,
then send it off to a happy new friend...
and wait for your OWN Skinny Pincushion to arrive
from another swappy friend!

The Patchsmith designed a sewing mat to go with her skinny pincushion!
Here's the skinny on the swap:

1. Email me to tell me you would like to join the swap.
eamylove@aol.com

2. Specify whether you are able to ship internationally,
or if you would only want a partner in the US, 
or your home country.

3. Include your own mailing address in the email.
Also include any likes/dislikes and requests about colors, themes, or size.

4. Spread the word to other friends who might want to Get Skinny!

5. The swap registration will close on January 31, 2014 at midnight.

6. You will receive the mailing address of your partner from me,
via email, sometime in the first week of February.

7.  Create your Skinny Pincushion and mail it to your partner 
by February 28, 2014.

That's all!
We have started up a Flickr page,
and you can get ideas or cheer others on,
as they get skinny.

I found lots of inspiration on our Across The Pond Flickr page:

I think this is the BACK of the one by Elly of Mad4Patchwork!
The front is so sweet, too!

So many cute little motifs on one skinny pinny!

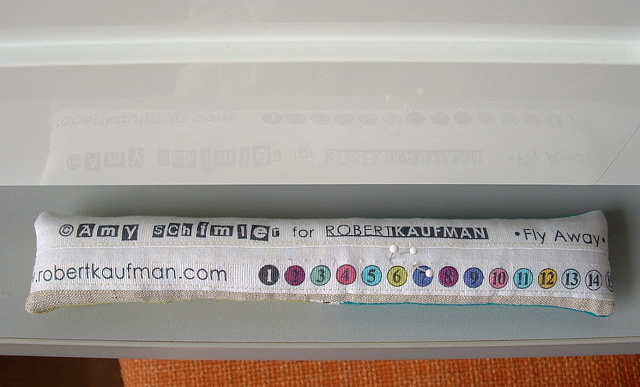
Vera of Negligent Style used selvages to make hers unique
and fascinating.

Vera is motivating me to get skinny right now!
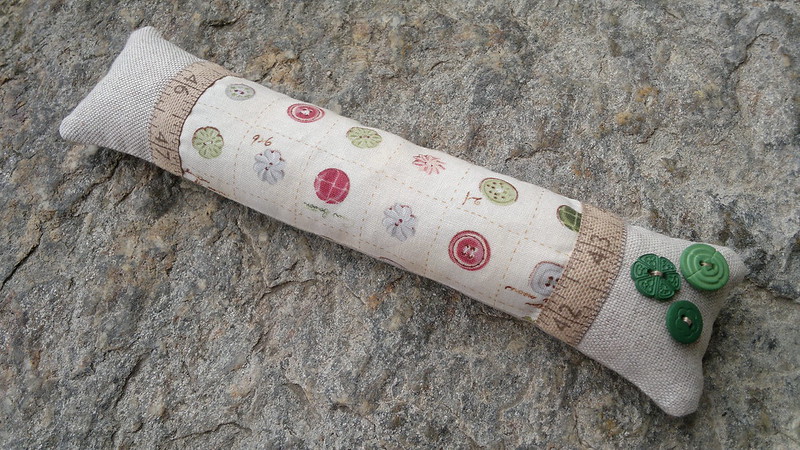
Cindy's Skinny Pinny is so stylish
and sweet, in every detail.
Those buttons are just so charming!

Visit Cindy at Adventure's of the Singing Quilter for more ideas.
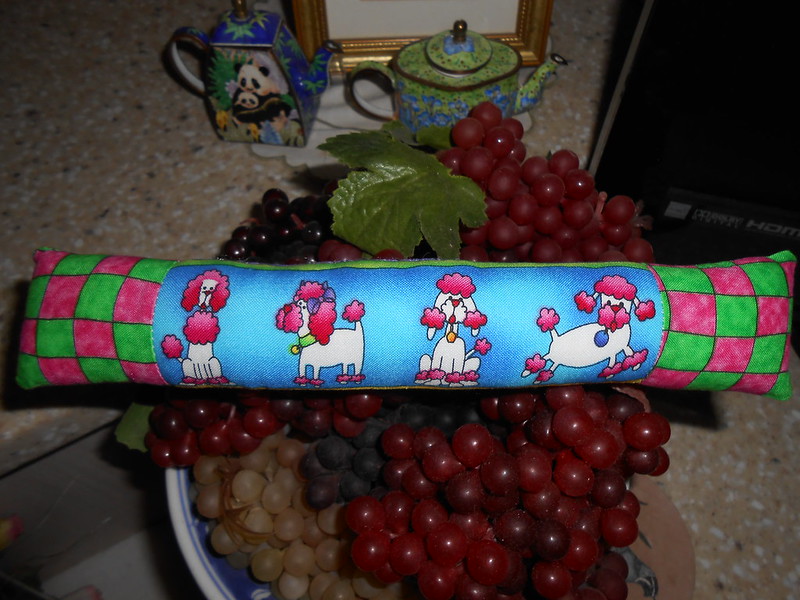
Pennie Pins posed her poodle pinnie
on Flickr.
Pennie's poodles are sitting pretty for healthy snacks.

Top 5 reasons "Getting Skinny" was never so easy:

5.You can do it in less than an hour.

4. All of your clothes will still fit you, no matter what your size.

3.  You can lie down while you Get Skinny,
and you won't need a nap when you're done.

2. While you are getting skinny,
you can eat chocolate or ice cream,
or even chocolate ice cream!

1. You'll have a new Skinny friend,
when it's all done!

So sign up now by emailing me at eamylove@aol.com.
We'll all Get Skinny together!


Pin It

January 9, 2014

Quilty Fun - Flying Geese, Chubby Chevrons, and Cocoa Cups

I promised to show my latest blocks

Here they are...all finished up!


First I made a whole flock of little tiny
Flying Geese!


I'm happy that I used the same green for all of the backgrounds,
even though my little green spatula blocks blended in
a bit too much with the background.


I was kind of scared to try making this block
the Quilty Fun way...
I've read mixed reviews about this method,
and the finished blocks are sooooooo small!

I decided to try just one block
using the technique provided in the Quilty Fun book.
Admittedly, I had very little fabric to trim away,
but my little blocks came out really well!

I just kept going,
and they all seemed to work out right.


I think the secret to my success was that I used
a spool of 50-wt Aurafil thread for piecing,
and it was noticeably thinner than the thread I usually use.

{I think I LOVE Aurafil thread for piecing little blocks!}

Another trick I tried was to use a hot iron with NO STEAM...
to avoid any distortion of those little wee blocks.


After my success with the Flying Geese blocks,
I was feeling pretty cocky...
maybe even over-confident!


It was really fun to choose the fabric pairs for the x blocks.

{Oops...I can see a little mismatch of seams there on the right. 
Oh, well...no one likes a show-off!}


The Cocoa Cups block was the easiest so far...
nice big pieces to cut and sew,
and those handles were really slick to stitch!


I think that this mug
looks a lot like a Cath Kidston crush mug!


On to the next block...
come back again soon to see mine!


Pin It