April 27, 2013

Copenhagen Pillow Finish

Have you seen the crochet-along
with Lisa over at Cubby House Crafts?


Or perhaps at her sister Jane's blog,


I think I could win a prize for being the one who
started the project first,
and also finished it last!

a long time ago.
In an earlier post, I told the story of my decision
to make this pillow, 
even though I barely know how to crochet.

{It's just too pretty to pass up, isn't it?}


My crocheted panel has been finished for quite a while,
but if you look at the pattern,
you might notice that there are no specific
instructions for making it into a pillow.

{More or less, they recommend stitching the crocheted panel
to a finished neutral pillow.}

That didn't really bother me,
because I've become a bit of an expert on making pillows.
Here's the way I finished mine...


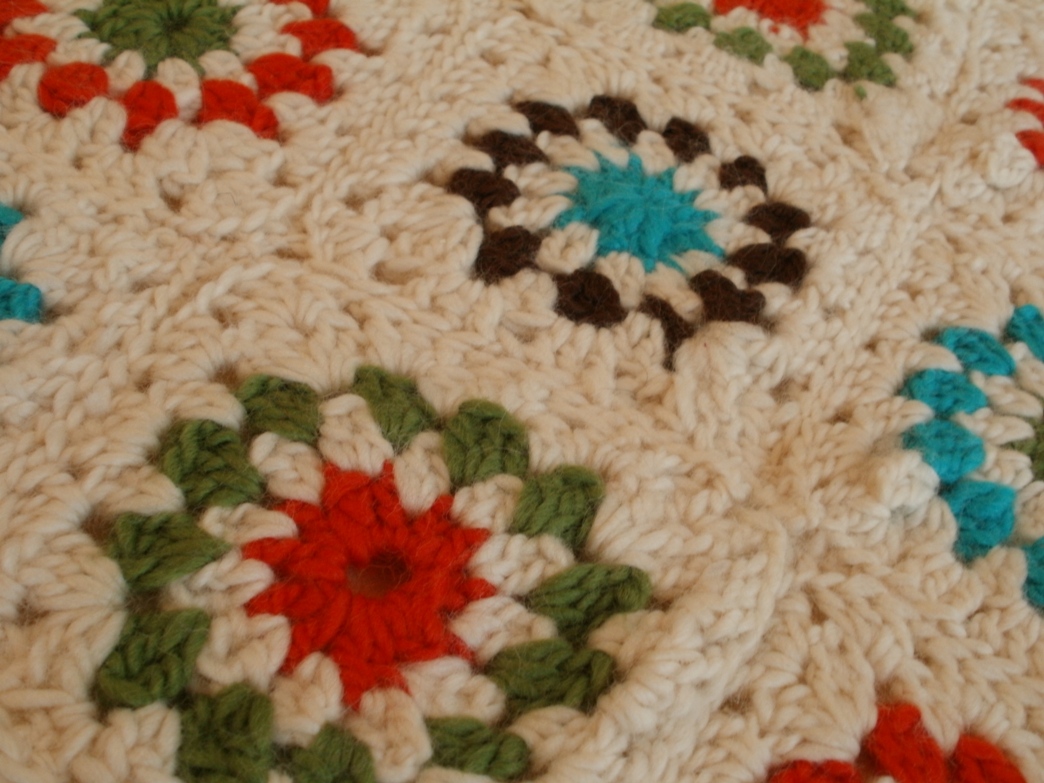
I started out by giving the crocheted panel
a good pressing with the iron.

{Mine was very lumpy and bumpy, but it flattened out easily
with some steam. And yes, it smelled like a wet sheep, for a minute.}


I chose a creamy Bella Solid to back the panel
and create the pillow front.
To give it body, I fused Pellon ShapeFlex 101SF
to the wrong side of the fabric.
Then I stitched the panel onto the fabric,
along the scalloped edging.

{I'm so glad I added the interfacing, because it was quite heavy at that point.}


Next it was time to create the pillow back,

Months ago, I was shopping at JoAnn,
and this piece of fabric caught my eye
making me think of my Copenhagen yarns.
I snagged it, and I really love how it coordinates.


I love me some colorful zippers, too, 
even though they are destined to be covered.
Which one do you think I chose?


It wasn't easy,
but predictably I went with the Caribbean blue,
since I had some fabric in that shade.


After constructing the pillow back,
I trimmed the front and back to the same size,
then stitched them right sides together,
rounding the corners.

{My pillow tutorial starts out a bit oversized, and is trimmed to size at the end.}


Uh-oh.
Anybody want to guess what I didn't do?

I forgot to leave that zipper partway open for turning!
Oh.My.
But I remained calm,
and I managed to get the zipper open by grabbing
the pull, through the fabric layers.

{And no bad words flew out!}


I used an 18" pillow form to fill my
finished Copenhagen Pillow...


I wish I could show you how squeezy and plump it is!


I really enjoyed making this pillow
and seeing the other lovely palettes
from the crochet-along.


I had planned to use mine as part of my autumn home decor,
but it's already bringing a lot of springtime cheer
into the house.


I think I'll leave it on the couch for a long time!
Pin It

April 25, 2013

Christmas in April

Back in January,
I made a commitment to myself to sew
at least one Christmas-y item each month.

As it turns out, I wasn't the only one 
who had this great idea!
Julie, The Crafty Quilter, really has her act together,


And now I'm linking up with Christmas Through The Year
at Lily Patch Quilts, too!
Head on over there for even more ideas and a linky party.

I wondered whether I would have trouble
with motivation when warmer weather arrived
and the trees were budding.


As it turns out,
while I was stitching away on my new
I felt...downright festive!


I had made this pillow once before,
using my must-have-in-the-house-at-all-times
Pellon 987F Fusible Fleece.


For this new version,
I had a jumpstart, since
I had already cut out my snowflake design...


and chosen my Cherry Christmas fabrics.


I did a bit of stitching here...


and some quilting there...


and pretty soon I was ready to make the back of the pillow.


I used my very own tutorial for a


I was grateful for the good tips I'd written down,
because it's been a little while since I made a pillow.


My house is going to look so merry this Christmas!


Stay tuned...now that I'm pillow-happy,
I'm going to finish off my Copenhagen Pillow!

{It's about time, right?}


Pin It

April 15, 2013

A New Journal Cover...Eventually

Everyone probably already knows this,
but I'm going to say it anyway...

If you're gonna sew when you're tired,
you will need one of these:


No, not the adorable paper-pieced block made by Susie...
I mean you'll need the actual seam ripper!

I had to use mine late last night,
as I tried to finish my latest April project from

My dwindling pile of La Petite Ecole has been
calling me to make another journal cover
using this tutorial by Bloom.

Just one of THREE beautiful journal cover tutorials at Bloom blog!
I tried to modify the cutting measurements
to fit my own journal.
???

Somehow I ended up having to make 
very very very very skinny seam allowances,
for the final stitching.


And then...even after careful wielding
of Jack, the Seam Ripper,
and repeated re-stitching and re-rippping,
I still have an "issue" with the lower front edge.
I applied some Fray Check to the problem zone
and am keeping my fingers crossed.


And then...
my notebook just wouldn't fit!
But I HAD to have THIS cover for THAT notebook,
before I would go to sleep.

Look...
It's got a pretty strip of my favorite
La Petite Ecole prints,
and a little rooster applique...


and there's even an A on it for Amy.


Finally I won that argument,
and the notebook is in there to stay.


How, you may ask,
did I manage to squeeeeeeze 
the journal inside the cover?

;)

{I'll never tell, but I think I'm gonna have to get a new rotary cutter blade now.}

Oh, boy, am I glad I have my Sewing Journal,
so I could make notes on what didn't work,
and what to try next time!

The Good Journal
So now you know for certain
that I'm not a Perfect Sewist.
My notebook pages stick out a bit
from underneath the cover,
but I still love this little Teenager of a journal.

The Naughty Journal
Post your journal covers on the Across the Pond Sew Along Flickr page.
Pin It

April 13, 2013

French, British and American

Q:  What do you get when you mix
a French-inspired fabric line
with a British mug rug pattern,
featuring the American flag?


A:  THIS fantabulous Stars and Stripes mug rug
designed by The Patchsmith,
made up in La Petite Ecole fabrics.


for some pincushions using La Petite Ecole.
I'm not leaving any time soon!

I love the way the fabrics lend themselves to Americana.
They were perfect for the stars...


and the stripes!


I had lots of scraps and just stitched them into a
crazy patchwork piece for the backing.


Pretty sweet, huh?
This is just one of over 40 patterns
Amanda has created...so far!

I've always got the Craftsy link on my sidebar,
if you would like to check out
all of the great patterns, projects and classes they offer.

After I made the mug rug,
I decided to make a couple more
The one with an "e" on it will be mine forever!

{I know - Amy starts with an A...but it's e for eamylove.}


They look so cute on that mug rug.


I had to have one to keep, with the striped background!
It was a design choice I wasn't sure I would like,
but I was thrilled with how it came out.


I used the stripes for both of them, but in different colorways.


I think that "spare" pincushion is going to be listed

{SOLD - maybe I should make more?}


These are the prints I used on the backs of the pincushions.


I love using those ABC's for covered buttons
and I'm thinking of making some extras for sale.
Wouldn't they be fun?


I'm in the mood for more custom orders,
if anyone needs a nice Mother's Day present!

{I've got a few more fabric lines in my stash, if you have something different in mind.}


Pin It